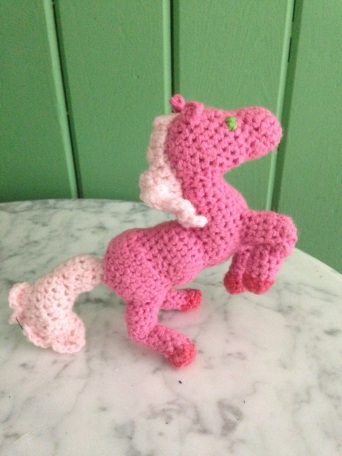
It’s already apparent that I’m accustomed to making projects much harder than they need to be. This crocheted pink toy horse was my very first attempt at a crocheted toy and originally, I was looking to follow a pattern out of a book. I came to terms with the fact that I just can’t be pigeon-toed into following directions. I wanted to create something similar but unique and since I recently gained yarn from my old neighbor and sister, I really didn’t have the choice of using “correct” colors for this.
Supplies Needed:
Patience
Fine Yarn (3-5 colors optional)
4.0 mm hook
Yarn Needle
Stuffing
If you have a pattern for a horse head and body that you prefer, please don’t hesitate to use it and skip to the leg section of this pattern.
To Start: Select the color you are looking to work with and your hook.
Row 1: Ch 2, sc 6 in first ch, do not connect to make rows; (climb instead, rows will appear to be rows without that noticeable connection space), sc 2 onto first sc in row 1.
“Row 2” sc 2 in each of the 5 remaining sc’s from row 1, sc 1 into next one.
“Row 3” sc around making a total of 17 sc’s; the method used and count in each stitch won’t make a difference unless you load 3 or more into one stitch on the way around.
“Row 4” repeat Row 3.
“Row 5” descend in stitches from Row 4 by 2; sc 1 around 8 stitches, skip 1 stitch, sc 1 into next 8 stitches.
“Row 6” repeat Row 5. This will start making the nose more distinct.
“Row 7” repeat Row 6.
“Row 8” expand back to sc 18 stitches doubling up in the two stitches you removed in the last two rows. This will begin to build the face where the eyes will go.
“Row 9” expand to sc 20 stitches total remembering to expand by 2 sc’s in that row.
“Row 10” repeat row 9.
Stuff the head as well as you can before descending in stitches to close it up.
“Row 11” descend sc’s by 2 remembering to skip two stitches of equal distance from each other.
“Row 12” descend sc count again by 2.
“Row 13” descend sc count by 4.
“Row 14” sc 9.
“Row 15” sc 5.
Stuff more into the head. I found that by stuffing with the hook’s end and swirling the stuffing around helped get more into the head than closing it without the additional stuffing.
“Row 16” sc 2, making sure to ch 1 additional, pull through and tie off.
Your horses head is complete.
Next starting from what should be considered the end of the jaw or “Row 10” create an oval lining up with the back of the head. Mine shows sc 10 stitches around.
“Row 17” sc 14, adding sc 2 in the front and back of the neck, this will begin to build the chest and back of the head where the mane will go.
“Row 18” sc 18, adding 2 sc 2’s in the front and back of the neck in the similar location as the additional 2 stitches in row 17.
“Row 19” sc 20 only adding 3 sc 2’s in the front in the same region as the previous rows in the chest. You should notice the build up in the front take on a shapely round curve in the front and a stumpy area in the back.
Repeat row 19 for “Rows 20 -22”
Stuff the chest enough to be able to hold the chest and work on the remainder of the body.
“Row 23” sc 26 around, repeat this for “Rows 24-27”
“Row 28” sc 22 skipping 4 stitches around. The particular order does not matter so long as the four stitches that will be skipped are not all in a row.
Stuff the chest some more, as much as you can without fully extending the sc stitches that have already been made to expose the stuffing. You will know when you have stuffed it too much. Remove any extra stuffing that may have exposed these areas.
“Row 29” sc 18, skipping 4 stitches around, similar to row 28.
“Row 30” sc 12, skipping 6 stitches around.
“Row 31” sc 8, skipping 4 stitches around.
Stuff any additional stuffing if you find you need more to shape the chest.
“Row 32” sc 5, skipping 3 stitches around.
“Row 33” sc 2, skipping 3, ch 1 to tie off.
The chest is now finished.
Start the back and stomach by picking a spot on the back of the neck to start the body. I went about half way down the back and started there and made sure to build the body by making an oval as close as I could to a circle in the first round of stitches. Please keep in mind this is harder than it looks when any of the body parts are stuffed.
“Row 34” slip stitch into the middle of the back and tie a knot. Sc 19 all the way around towards the base of the chest and back to the back.
“Row 35” repeat the same 19 stitches.
“Row 36” sc 24 adding sc 2’s in the stomach area to expand the oval into a circle on the right and left of the horse’s stomach.
“Row 37” sc 28 adding sc 2’s again in the stomach area.
“Row 38” sc 28 around in the next four rows: “Row 39-42”.
“Row 43” sc 24 descending in stitches in 4 stitches even from each other.
“Row 44” sc 20, descending in stitches in 4 stitches even from each other.
“Row 45” sc 16 descending in stitches in 4 stitches even from each other.
Stuff the stomach. This will show you how to close the stomach. It’s better to have a rounded end as this helps the height in the rump area.
“Row 46” sc 12 descending in stitches in 4 stitches even from each other.
“Row 47” sc 8 descending in stitches in 4 stitches even from each other.
“Row 48” sc 5 descending in stitches in 3 stitches even from each other.
“Row 49” sc 2 descending in stitches in 3 stitches even from each other, ch 1 to tie off.
This ends the stomach.
Next is the rump. I designed this horse to be similar to real life ones with all of their curves so the rump will rest higher than the highest point in the back by a couple of stitches and roughly the same at the belly. To achieve this start the stitching at the “Row 38”.
“Row 50” slip stitch into “Row 38” and tie a knot. This has to be stitched as a circle, flesh it out with extra sc stitches if you need to, to make it round. I used sc 26.
“Row 51” sc 34 all the way around expanding primarily in the top of the rear adding sc 2 every other stitch.
“Row 52” sc 34, repeat in the next 4 rows: “Row 53-56”
“Row 57” sc 28, descending in stitches in 6 stitches even from each other.
“Row 58” sc 20, descending in stitches by 8 stitches even from each other.
“Row 59” sc 14 descending in stitches by 6 stitches even from each other.
Stuff the Rump.
“Row 60” sc 12, descending in stitches by 2 stitches even from each other.
“Row 61” sc 8, descending in stitches by 4 stitches even from each other.
“Row 62” sc 5, descending in stitches by 5 stitches even from each other.
“Row 63” sc 2, descending in stitches by 3 stitches even from each other, ch 1, pull through to tie off.
The legs…were the most annoying part of all of this because it’s a tiny space to work in.

Each of the legs consisted of four closely crocheted ovals as bases, their positions are entirely up to you. I am going to explain the creation of the thigh, calf and hoof to one leg. As the front were more irritating than the back, I’ll explain the front.
To start the thigh, slip stitch onto the side that you would like to build it onto first. I’d suggest starting at the top of the oval and working your way around.
– Sc 2 into one stitch, sc 4, curve by sc 2 into next 1 stitch, sc 4 and connect to first sc. Continue first row exactly the same way 4 times. Stuff. This will be difficult. I used the end of my hook, stuffed and swirled it around until it packed the thigh enough to work on closing it.
– Sc 8 around descending by 2 stitches equally from each other.
– Sc 4 around descending by 4 stitches equally from each other.
– Sc 2 around descending by 2 stitches equally from each other, ch 1, pull through to tie off.
Create the calf muscle by recreating the same oval on the back side of the thigh.
– Sc 2 into one stitch, sc 4 curve the oval by sc 2 into the next 1 stitch, sc 4 and connect to first sc.
The calf muscle generally gets smaller towards the hoof in pictures of horses, the next row will descend in stitches to achieve this.
– Sc 8 around descending in stitches by 4 equally from each other.
Repeat Sc 8 in next 5 rows, last row will ch 1 to tie off.
Stuff calf muscle up to the rim and select hoof color.
– Sc 8 for next 3 rows.
– Sc 5 descending in stitches by 3 stitches equally from each other.
Stuff the hoof too before closing the leg up.
– Sc 2 descending in stitches by 3 stitches equally from each other, ch 1 to tie off.
The trick to the legs are simple once you thing about it. You will need to create halves of legs to get the bend correct. Keep in mind that it’s very important to make sure that every leg is proportionately correct or the design will be flawed and your horse will not stand up.
The tail.
Building the tail is similar to the neck. You will slip stitch and crochet a circle a little higher than the middle of the rear-end, which is where its located on a regular horse, sc 6 stitches around.
Repeat the sc 6 in the next row.
You will start building an oval which will build the lower area of the tail.
– Sc 3, sc 3 in one stitch, sc 3.
– Sc 4, sc 3 in same area as the 3 stitches above, sc 4.
– Sc 4, sc 3 in same stitch, sc 2 in next stitch, sc 2 in next stitch, sc 2 in next stitch, sc 2.
– Sc 2 in every stitch for this row and the next two rows.
Stuff the Tail.
On one side, sc through both sides of the tail closing the gap between them.
– Ch 2, dc 2 into both sides (do this by pinching both sides together and going through two open stitches one on close to you and the other farther from you) do the same dc 3 in the next stitch, sc 1 in next stitch to create a ruffle; ch 2, dc 5 into next stitch attaching front and back as described before, sc 1 in next stitch; ch 2, dc 5 into next stitches, sc 1; ch 2, dc 5 in next stitches, sc 1, ch 1 to tie off, leave slack to sew in and excessively sew the area you just stitched up in case you missed anything.
The mane is up to you, but this is what I did.
To achieve this look, start from the center of the top of the head and sc one line down the middle of the back of the neck ending at the base of the shoulder area and turn.
– ch 2, dc up the way you came, until the second to last stitch, these will be hdc 1, and sc 1, Turn.
– ch 1, skip one stitch, sc on the way back down, turn.
– ch 1 and use the dc 5 to sc 1 pattern for the scalloped design found in the tail. Once finished, ch 1, tie off and sew in.
Add the ears directly on the head.
– Slip Stitch and tie a knot where you would like the first ear to be.
– Sc 3 into same stitch, Turn.
– Ch 1, hdc 1 into first stitch, sc 3, ch 1 to tie off. This should make a triangle.
Repeat this on the other side of the head where you would like the other ear to be.
For the facial features you are more than welcome to create a bottom lip.
This is going to simply be a sc line across the bottom of the nose, out only maybe two or three rows. I didn’t decide to do that though but it is easily the simplest part of this whole design.
Otherwise, sew in the eyes, nose and mouth with a yarn color of your choosing.
Sew in remaining areas and you’re done!


